GET NEW FREE PRINTABLES BY EMAIL. SIGN UP FOR THE PRINTABLES NEWSLETTER.
- Home
- Craft Business
- Display Booth Photos
- Portable Craft Table DIY
Make a Portable Craft Table Using IKEA Legs
These simple instructions will help you build an adjustable and portable craft table for your booth or your studio using inexpensive legs from IKEA.
When I went looking for a table that was appropriate for my booth, I couldn't find exactly what I wanted anywhere, so I ended up making my own.
Here's how you can make you own table, too using inexpensive supplies from Ikea.
Easy Portable Craft Table Instructions

The table you see pictured on this page is made using Ikea Vika Byske legs, which adjust from 27 1/2 inches to 48 1/2 inches, and a Vika series table top.
I've never actually used this table in a craft booth, although you could. (You can find information about the ones I made for my booth here.)
This table functions as an island in my kitchen. However, when I was putting it together, I realized it would be perfect for use in a craft booth.
- The legs can be adjusted to the perfect height for a craft display table.
- The legs screw on and off very easily, which makes it easy to transport.
- The legs can be attached to any size top, so you can create any size that meets your needs.
- The entire thing is quite light-weight.
- It was affordable. With a 2x4 foot Vika system table top and 4 Vika Byske legs from Ikea, a portable craft table like this would cost about $140. If you buy a piece of inexpensive wood from a building supply store to use as the top, it would be considerably less expensive. You'd just have to make sure you were comfortable placing the legs correctly.
Why Make Your Own Custom Craft Table?
If you're not sure what dimensions are ideal or why you'd want adjustable height legs, Please read about how I determined what I needed for my own tables.
What You'll Need
Four adjustable height legs
Vika Byske legs from Ikea are ideal for this project.
The Ikea website states that these legs should only be used with wall mounted tables. However, I have used 4 of these legs set at 36 inches high and attached to a free standing table top in my kitchen for 3 years. It gets a lot of use and abuse. I have two little kids, and we eat there every day, and I have had no problems with the legs being attached to a free standing table.
Table top cut to your preferred size
Ikea does sell table tops under the Vika collection that are only 24 inches deep. These tops may suit your needs, and using an Ikea top would make this project slightly simpler because they have pre-drilled holes for attaching the legs.If the Ikea tops aren't the exact size you need, simply go to your local building supply store, where they will cut a piece of wood to the exact size you want (usually) free of charge.When you're choosing your table top material, you don't have to worry about what it looks like if you intend to cover the tables. Do consider the weight of the material so it will not be too heavy to move.
Assuming you're not using an Ikea top, you'll need a drill, and you might need some screws.
Assembly Instructions
If you are using a top from Ikea with your Ikea legs, simply follow the assembly instructions that come with them.
The assembly instructions below assume you are using a custom sized piece of wood as a top. NOT a top from Ikea.
 Mounting bracket screws into the bottom of the table, then the legs screw into the mounting bracket. The legs can be unscrewed from the mounting bracket to make the table flat and easy to transport.
- Ensure the screws that come with your adjustable legs are not too long (i.e. make sure the screws you use are shorter than the thickness of your table top), so they don't go through your top. If they are too long, you'll need to buy shorter screws.
- The Ikea Vika Byske legs come with a round mounting bracket that you screw onto the under-side of the table top (and the legs then screw into the mounting bracket). If you're using your own top (not one from Ikea) lay the table top flat with the under-side of the table facing up.
- Place a round mounting bracket at each of the four corners of the table top (an inch or two in from the edge of the table - measure so each mounting bracket is placed the same distance from each edge).
- You'll see several holes in the brackets. That's where the screws will go. Hold one of the brackets in place (check the instructions that come with the leg to ensure you're installing the bracket right side up) and, using your drill, screw the bracket in place (you may need to drill pilot holes first). Repeat for the other brackets on each corner.
- Screw each leg into the brackets, and carefully adjust the length of the leg to suit your needs. The Ikea Vika Byske legs adjust from 27 1/2 to 42 1/8 inches, which is ideal for use as a portable craft table. Because the legs are adjustable, you'll be able to experiment a bit with your height.
One huge advantage of using the Ikea legs, is that the legs easily screw into and out of the mounting bracket that is attached to your table top. That means you can easily remove the legs to make your portable craft table more compact for transporting and storing.
More Craft Display Ideas
Craft Show Success
Craft show success hinges, in part, on bringing customers into your booth. Here are 9 strategies to entice customers into your booth.
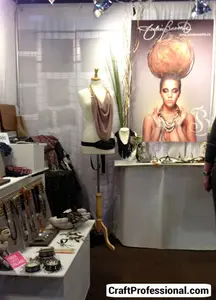
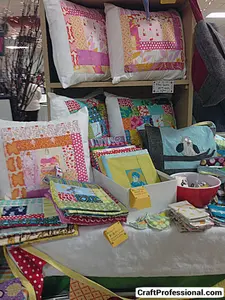
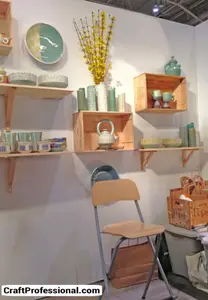
Craft Show Display Ideas
Find craft show display ideas with three free and easy ways to find great booth photos that will give you inspiration to create your own great displays.
Craft Show Success Secrets - Merchandising
These craft show success secrets will help you use effective merchandising strategies to make the sale at your next craft show.
Home | About | Contact | Newest Updates | Newsletter | Privacy | Terms of Use | Advertising Disclosure
If you buy something through links on Craft Professional, I may earn a referral fee. Details are in my disclosure.
Copyright © 2006-2026 CraftProfessional.com - All rights reserved.