Baby Room Mural Tutorial
Here's how to paint a pretty and very easy baby room mural.
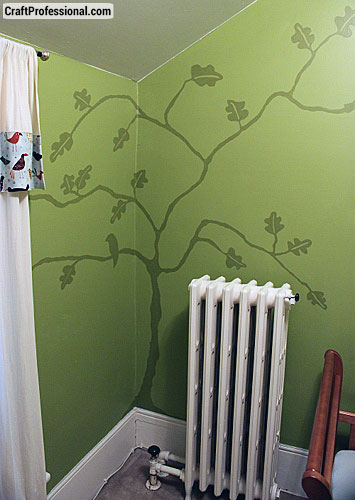
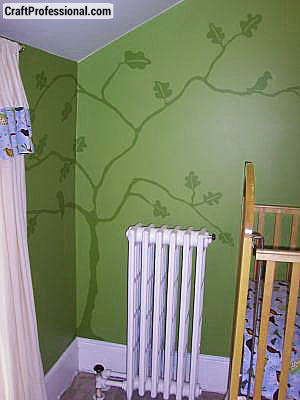
Creating this mural in my son's nursery was simple and didn't take a lot of time. I wanted to add a tree silhouette to one of the walls. Since I was pregnant when we were working on the room wanted to avoid paint for the time being, my husband agreed to get crafty and do this simple mural for me.
First he painted the nursery with Benjamin Moore Jalapeno Pepper, which matches the medium green birds in the Creatures and Critters fabric by Amy Schimler for Robert Kaufman fabric I used throughout the room. The trim is Benjamin Moore Cloud White, which we've used throughout our house.
Initially we had a minor moment of distress when my husband brought the Jalapeno Pepper paint home. He put a bit on the wall, and we both thought it was horrible.

After a helpful chat with the great people at our Benjamin Moore store, we decided to paint more of the room before passing judgment on the color.
That was a great call because the color took on a whole new character once we had two coats covering a larger portion of the room.
We both love the baby room paint colors now.
I created the tree image for the baby room wall art, which was inspired by an adorable baby's nursery on Better Homes and Gardens, which I'd love to link to, so you can see the original, but BHG appears to have removed the page from their site.
I started with the tree on the BHG site, but the image there didn't include the entire tree, so I used graphic editing software (I like paint.net for PC, it's a lot like Photoshop, but it's free, or Gimp - also free - for Mac) to edit the image, extend some branches and add some more branches to fill out and finish the tree image.
I printed the image on a transparency, and my husband borrowed an overhead projector from work and projected the image onto the wall in the nursery.

Once we got the image projected exactly where we wanted, we placed a can on the transparency so it wouldn't move (the transparency can shift easily, so it's good to use something to hold it in place).
My husband drew the outline of the image on the wall in pencil, and then he used a small brush to paint the outline of the tree silhouette using Benjamin Moore Dark Celery paint. Once he finished the outline, he filled in the rest of the silhouette.
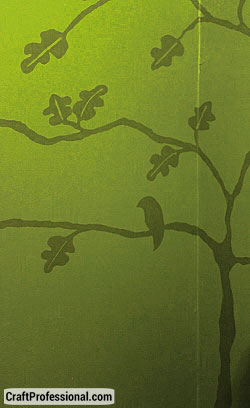
Once the silhouette was completely dry, he added the light green lines from the wall color (Jalapeno Pepper) to form the veins on the leaves. This step is subtle, but it made a huge difference in the look of the silhouette.
I'm really happy with the way the baby room wall art has turned out. It was not difficult to do, and it uses very little paint, so it was quite inexpensive.

Painting the baby room mural did take a little longer than expected. The whole process took an afternoon (plus a bit of time to add the lighter color once the silhouette was completely dry).
You could paint any type of silhouette to match the theme of your room. If you're not handy with graphics editing software, iStockphoto.com or dreamstime.com are good places to look for inexpensive images for this type of project (just do a search for the word silhouette and whatever image you want).
The key to making this baby room mural project work is to keep it simple. If you're not a painter, don't get too fancy with the image. Also, in my opinion, painting the silhouette a few shades darker than your wall color (rather than a contrasting color) keeps the effect subtle and not over done.


New! Comments
Have your say about what you just read! Leave me a comment in the box below.